FINALLY a Minnie Mouse cake.
I am always searching through cake design websites and forums and they are full of Minnie and Mickey, but no one had ever asked me to make one.
This cake is for the sister of the little boy Michael I met through Icing Smiles.
Siblings deserve a special cake too but unfortunately she did not fall into the age guidelines set by the organization.
So, I decided I would take matters into my own hands and create an Icing Smile just for her.
Minnie Mouse!
My favorite things about Minnie are her skirt, polka dot bow, and eyelashes. I had to get all of those elements on this cake.
A few days in advance I made her ears using a mix of black fondant and gumpaste. I rolled it out to 1/4 inch thick and cut 4 circles with my 3 inch round cookie cutter ( for the top of a 6 inch cake).
I sandwiched a piece of floral wire between two circles the same way I make stars in my Avengers cake post.
Let these dry hard.
I also made the bow which I have not yet done a tutorial on but trust me...it's coming soon.
I used my ribbon cutter set quite wide and cut out a strip of red fondant and gumpaste.
You want a lot of gumpaste in your bows to make them stiff.
I fold each end to meet in the middle.
Grab some paper towels and roll one sheet into a log, then fold it in half so it's not as long. Insert that into the bows loop to prop it up while it dries.
Repeat on the other side.
In the middle where the 2 ends meet pinch with your fingers to narrow it.
Roll out a little more fondant / gumpaste and cut another strip with the ribbon cutter.
I pinch in 2 pleats and then wrap around the middle of my bow to cover where the 2 ends meet.
Let bows dry at least 48 hrs.
I will be doing a pictorial on this in an upcoming post.
Once my bow was dry I used the open end of an icing tip to make dots and applied them to the bow with water.
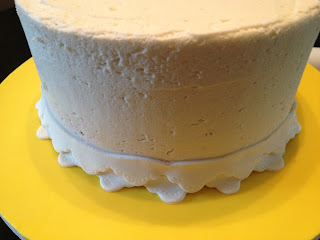
The bottom tier is Minnie's skirt.
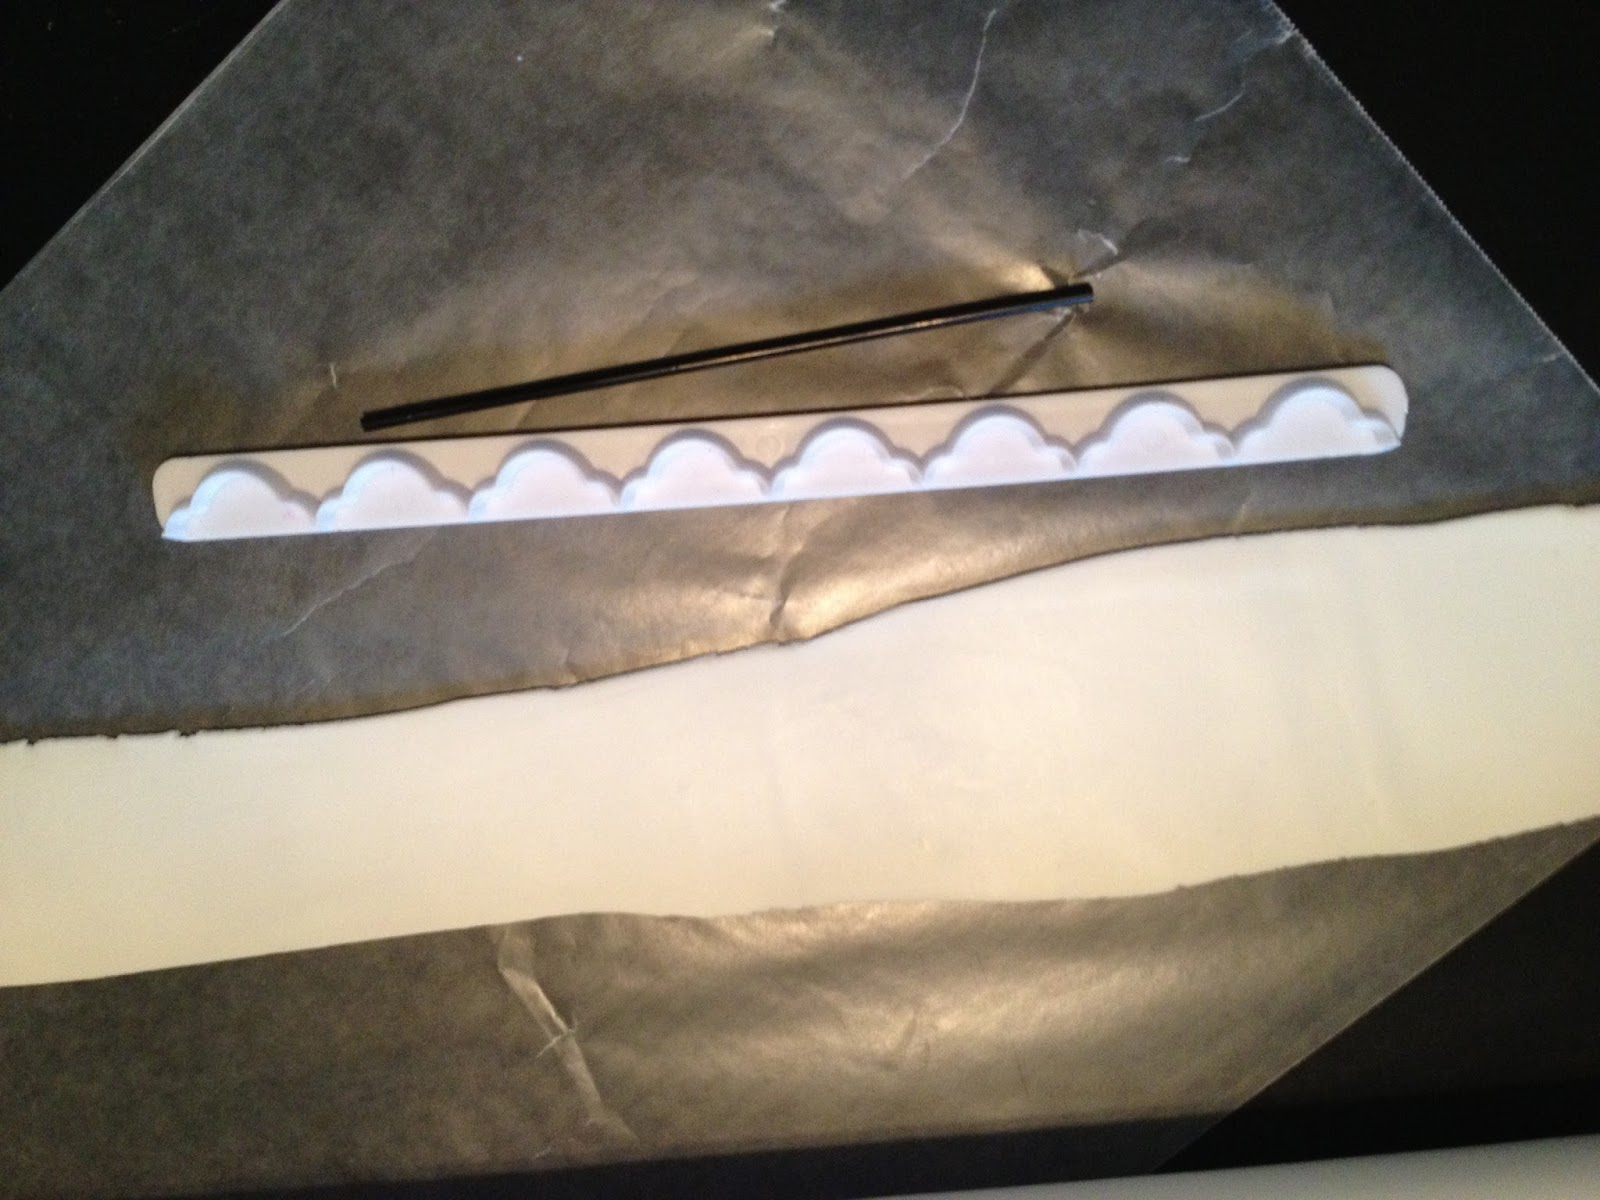
I added the lace petticoat by using one of my border / frill cutters and making strips.

Then I used a cocktail straw to make impressions in the strips.

You do not need to use the exact edge cutter I did, any one will give it some flair.
Wrap the strips around the bottom of the cake until they meet. It's OK if you do these in sections.
Repeat for a second row and stagger them with the first.
My butter cream looks terrible but that's ok. The next step is the easiest way to cover that up...EVER!
For her skirt I rolled some red fondant out to 1/4 inch thick and draped it over the top of the cake allowing it to fall into pleats.
With the open end of an icing tip I made more dots and attached them randomly to the skirt with water.

Insert support dowels and stack the next tier.

I gave her an abstract belt made of black fondant. Rolled out and cut with my ribbon cutter.
If you don't have a ribbon cutter and you plan on making a lot of cakes it a worthwhile investment.


I found two Disney fonts, one was Waltograph and one was Walter. I prefer the Walter font but check them both out to see which you prefer.
I printed her name out on computer paper, rolled out red fondant, and cut her name out with an Exacto knife.
I have three tips for cutting out letters from a computer paper template.
1. cut out the insides of the a's , o's , d's etc first...do this while they still have stability from the outside of the letter.
2. use a piece of wax paper between your template and fondant, the paper will stick.
3. cut the letters in reverse. I flip my template over so the print is facing the wax paper and cut from the backside so that when I am done I can brush with water and transfer onto the cake while they are still attached to the wax paper. This keeps the spacing perfect and doesn't distort the letters from stretching.
Press firmly and evenly onto the cake and then very gently peel the wax paper away.
I have a set of Mickey & Minnie cutters I purchased on ebay that I used to make her face, complete with those eyelashes!
I also happen to know where you can purchase these faces already made on ETSY just request a custom order for however many you would like to add to your cake ;)
I attached that face to her skirt.
On top I set the bow. I use a little water to hold it in place and I also stick 2 tooth picks in the cake, inside the bow's loops to help hold it in place and prevent it from sliding off the cake in the event the water just wasn't enough.
Insert the wires of the ears into cocktail straws and trim to desired length and insert into the cake and you are done.
Minnie creates another Icing Smile.

I am always searching through cake design websites and forums and they are full of Minnie and Mickey, but no one had ever asked me to make one.
This cake is for the sister of the little boy Michael I met through Icing Smiles.
Siblings deserve a special cake too but unfortunately she did not fall into the age guidelines set by the organization.
So, I decided I would take matters into my own hands and create an Icing Smile just for her.
Minnie Mouse!
My favorite things about Minnie are her skirt, polka dot bow, and eyelashes. I had to get all of those elements on this cake.
A few days in advance I made her ears using a mix of black fondant and gumpaste. I rolled it out to 1/4 inch thick and cut 4 circles with my 3 inch round cookie cutter ( for the top of a 6 inch cake).
I sandwiched a piece of floral wire between two circles the same way I make stars in my Avengers cake post.
Let these dry hard.
I also made the bow which I have not yet done a tutorial on but trust me...it's coming soon.
I used my ribbon cutter set quite wide and cut out a strip of red fondant and gumpaste.
You want a lot of gumpaste in your bows to make them stiff.
I fold each end to meet in the middle.
Grab some paper towels and roll one sheet into a log, then fold it in half so it's not as long. Insert that into the bows loop to prop it up while it dries.
Repeat on the other side.
In the middle where the 2 ends meet pinch with your fingers to narrow it.
Roll out a little more fondant / gumpaste and cut another strip with the ribbon cutter.
I pinch in 2 pleats and then wrap around the middle of my bow to cover where the 2 ends meet.
Let bows dry at least 48 hrs.
I will be doing a pictorial on this in an upcoming post.
Once my bow was dry I used the open end of an icing tip to make dots and applied them to the bow with water.
The bottom tier is Minnie's skirt.
I added the lace petticoat by using one of my border / frill cutters and making strips.
Then I used a cocktail straw to make impressions in the strips.

You do not need to use the exact edge cutter I did, any one will give it some flair.
Wrap the strips around the bottom of the cake until they meet. It's OK if you do these in sections.
Repeat for a second row and stagger them with the first.
My butter cream looks terrible but that's ok. The next step is the easiest way to cover that up...EVER!

For her skirt I rolled some red fondant out to 1/4 inch thick and draped it over the top of the cake allowing it to fall into pleats.
With the open end of an icing tip I made more dots and attached them randomly to the skirt with water.

Insert support dowels and stack the next tier.

I gave her an abstract belt made of black fondant. Rolled out and cut with my ribbon cutter.
If you don't have a ribbon cutter and you plan on making a lot of cakes it a worthwhile investment.


I found two Disney fonts, one was Waltograph and one was Walter. I prefer the Walter font but check them both out to see which you prefer.
I printed her name out on computer paper, rolled out red fondant, and cut her name out with an Exacto knife.
I have three tips for cutting out letters from a computer paper template.
1. cut out the insides of the a's , o's , d's etc first...do this while they still have stability from the outside of the letter.
2. use a piece of wax paper between your template and fondant, the paper will stick.
3. cut the letters in reverse. I flip my template over so the print is facing the wax paper and cut from the backside so that when I am done I can brush with water and transfer onto the cake while they are still attached to the wax paper. This keeps the spacing perfect and doesn't distort the letters from stretching.
Press firmly and evenly onto the cake and then very gently peel the wax paper away.
I have a set of Mickey & Minnie cutters I purchased on ebay that I used to make her face, complete with those eyelashes!
I also happen to know where you can purchase these faces already made on ETSY just request a custom order for however many you would like to add to your cake ;)
I attached that face to her skirt.
On top I set the bow. I use a little water to hold it in place and I also stick 2 tooth picks in the cake, inside the bow's loops to help hold it in place and prevent it from sliding off the cake in the event the water just wasn't enough.
Insert the wires of the ears into cocktail straws and trim to desired length and insert into the cake and you are done.
Minnie creates another Icing Smile.


