Sunday, December 23, 2012

The Elf and Cookies

As if Christmas isn't stressful enough we have added a new irritant.
 Our Elf on the Shelf. Seemed like a great idea until our box arrived containing the creepy little guy. Unsure of what to think of it I opened the box , we read the book and Brandon named the elf Makamama ( no clue... ).
So, the elf is here, named  and everyone is waiting to see what the big deal is about the creepy little guy.
Of course it was my idea to order him so it's my job to make this elf thing happen.
I searched Pinterest, googled, and begged ideas off of my friends on facebook.  All of my research turned up one good idea, actually it is a great idea that came from my friend Janet who really made my elf ideas look pathetic.
So for any of you who entered into the elf phenomenon  and are at a loss for what to do with this thing this the best I could come up with. I hope it helps someone out there ...

~ Having a drink with Mom. ( of course I didn't leave this one  for Brandon to find )

Dinosaur reindeer and a banana sled.


Ahoy! It's pirate Elf run ashore ( in the bathroom sink ).


Adding to the family photo. Notice Mom is the angel? That's the benefit of being the one creating the mischief :)

A note from Makamama telling him of a special visitor. Our fire department brings Santa on a firetruck to hand out gifts later that  evening.


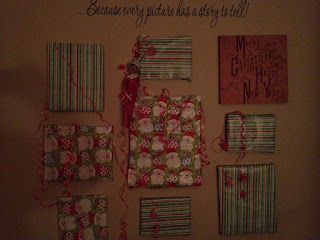
Practice wrapping presents.


Doing a little candy cane  zip lining.


He brought magic seeds ( red tic tacs ) from Santa and we had to plant them in the magic dust ( sugar ) and wait until morning to see what grows...


Hint..it will be candy canes. A little Elf told me ....

Now that all the Elf business is done, it's time to make the cookies for Santa.
Santa REALLY likes cream cheese cut out cookies with butter cream icing.
These are the best I've ever made.

Save and print jpeg
Make sure to leave A LOT of these for Santa!

Wishing you a very Merry Christmas... from our family to yours!


Sunday, November 25, 2012

The Most Popular Cake

If you are on Pinterest I'm sure you have seen this cake.

Seems like everyday it shows up in someones wedding plan folder.
With the popularity of it I knew it was only a matter of time before I had someone with a photo of this cake in hand.
I have done some research and I believe the original design was made by Shockley's Sweet Shoppe in Virginia.  I have to admit it is a very impressive, and intimidating cake.
The mother of the bride contacted me inquiring about this cake. I have made a similar cake using buttercream and whipped ganache. That cake was VERY expensive and time consuming to make. This time the cake will be done in fondant as pictured and only 3 tiers instead of 5. I'm hoping with my tall layers I will be able to save much of the look of this 5 tier majestic cake.
I'm going to drag all of you along with me through the making of this cake.
Hopefully it will help any fellow designers and decorators when faced with an order for what I predict will become one of the most requested wedding cake designs next year.

I started off  baking  layers and layers of white cake. 2 - 10x2  , 2- 8x2 , 2- 6x2. I also made an extra 6 inch layer to use as my ganache drip tester cake. We'll get to that much later.

Save and print jpeg

This cake was ordered with only white cake, and just a layer of vanilla bean buttercream to hold the layers together.
When I am filling a cake with vanilla buttercream I use my Vanilla Bean Butter Cream recipe for more flavor.
Just make your favorite buttercream recipe, using all butter and no shortening of course...and instead of using 1 tsp I use 1 TBSP of Vanilla Bean Paste. I cannot find it locally so I order online and keep a pretty deep stock in the pantry.


Next I dipped the strawberries. Instead of the Tuxedo berries on the original cake they opted for solid dipped chocolate and white berries , they also requested them stacked on top in lieu of a topper.

To dip the berries first I sorted through a fresh container and picked out just the right sizes for the cake.
Then I melted my chocolate in the microwave on 50%  stirring every 20 seconds until it was smooth.
Dip, hold steady and allow the excess chocolate to drip back into the bowl,  and place on parchment to harden...mine took approximately 30 minutes.


Next I torted, and filled my cakes with the layer of Vanilla Bean Buttercream . 
I tried a new technique for settling my cake, after I had it filled I wrapped the cake in Saran and placed a ceramic tile on top of the cake. It provides firm even pressure and squeezes all the extra air out of the cake in around 3 hrs as opposed to my old method of wrapping and letting set overnight to settle.

Once settled I gave it a nice coat of buttercream, smoothed it, and prepared myself for the fondant.

This cake requires 2 colors of fondant, seamed together for each tier. Satin Ice is still the only fondant I will use and worked great for this cake.


I rolled out some chocolate, peeled up the top of my mat, lightly trimmed a straight edge and placed a ball of white fondant next to it. Rolled it out , paying close attention to the seam, with smooth gentle pressure seal the 2 colors together.

Make sure the darker color is rolled out first so it doesn't show through the lighter fondant when flipped onto the cake.
I then I  transferred this to the cake.

Stack the cakes using dowels and plates for support.


I have a Wilton Pattern Press Set that I purchased YEARS ago on clearance and never used until lately, now I use them all the time. They make a beautiful, subtle imprint into the fondant covered cake boards and for the 'piping challenged' ,which I am, it is a great guide for piping buttercream scrolls.
On the white portion of each tier I did my scroll work using pure white buttercream.
Then I piped a 1/2 shell border at the base of the white side.

( this pic was taken after the ganache drip, please ignore that for now :) 

Now for the chocolate side, this is where my anxiety kicks in. Ganche can be your best friend or your worst enemy.  For the dripping technique it has to be just the right temperature to create just the right thickness so that it drips without running and pooling.
This is where my extra tester cake comes into play. I used it to test the temperature and drip effect.

Once it gave me perfect drips ( around 85 degrees ) I used my squeeze bottle filled with ganache and spread some along the top edges of the chocolate side, very carefully. Better to use too little in each pass than too much. Once I had enough to cover the top edges, I used a butter knife to gently push drips at random intervals to run down the sides of the cake. Start at the top of your cake and work down. These do not have to be perfect, if some runs and pools on the tier below it , that's ok, but try not to let all of the drips run all the way.

I practiced just how much of a 'push' I needed to create small drips on my practice cake. I recommend doing this. This is MUCH easier than I thought it would be.
Once you have your ganache drip , let this dry a bit before attaching your drape.

The final step is the swag, or drape.  I roll out a long strip of white fondant mixed with some gumpaste .


The gumpaste will give it a bit of stiffness so the weight of the drape won't pull on the cake too much.
Cut into 4 pieces each being the height of your tiers.

Fold gently like an accordian but do not apply any pressure, you will be fanning this out once on the cake.


Pinch at the top , and damped the underside lightly with some gum glue.
Attach the top to the cake by pressing, and drape down the side.
Repeat for each tier starting at the bottom and working up.


For the last drape, on the top tier, I roll a longer piece of fondant/ gumpaste mix and drape over the top and down the sides and keep it all one piece.

I waited until the cake was set up at the banquet facility to set the strawberries in place , once that is done you can breathe.


This is a gorgeous cake, it uses a few intermediate level techniques and even with all my experience I relied on some experts to guide me through a few steps.
If you are asked to make one , or just want to make one for yourself, make sure you have time, patience, and a practice tier. There are no shortcuts, skimps , or corners that can be cut when making this cake but it's worth every minute you put into it.


Wednesday, October 31, 2012

Last Minute Halloween Treats

With all of the cake madness I almost forgot to post some Halloween goodies.
Actually, I forgot today was Halloween until my 3 year old came running out of his room in his costume this morning .
So VERY quickly, with what I had on hand, I had to whip up something festive.
Fortunately I had some left over cupcakes from Saturday in the freezer so I pulled those out, whipped up some buttercream, and dug through my candy melts for some Halloween colors.

First I made some spider webs out of Wilton's white chocolate candy melts.
 I'd love to take credit for the creativity but I was in a hurry and found a great idea thanks to Country Living ( along with a tutorial ) . <- click here for the tutorial.

I used waxed paper over my print out and piped some spiders in white chocolate.


I didn't even have to put these in the fridge, they hardened so quickly and just slid right off the waxed paper.
I was going to be ambitious and make black spiders on the webs , but I had a daunting task ahead so I just stuck them on the cupcakes.


Cake pops!
 For the record I still don't like them.
If you follow my blog then you already know how my 1st attempt went. I'm not much better at them but I am using what I have on hand. I crumbled up a few left over cupcakes and mixed in some buttercream, balled it up and put it in the fridge while I took my shower and got into costume.
I have a tutorial on here for cake pops already so I will spare you the details.
I decided to use up some sugar eyes I have had forever and make some monster pops.
These are great for cake pop newbies like me , it won't matter if you have a lumpy pop.
I dipped them in bowls of orange, blue, and green . ( My dipping skills are sub par, I cheat and wipe a little around the stick with a knife in my next unpublished step :)

Then I filled up some Wilton squeeze bottles with the left overs and drizzled the cake pops with it.


Add an eye

...and it's Monster Cake Pops!
Fortunately I had seen these on Pinterest a few weeks ago and made mental note.
All of this was done in under 2 hours !


so if you forgot Halloween ( who does THAT?!? haha) you can still save yourself in a hurry .

Have a Happy and Safe Halloween!!

Sunday, September 16, 2012

EB Awareness Cake

In the city I am from, in the hospital that I was born, a little boy came into the world on August 23, 2012.
Easton Dominick Friedel is his name and this sweet baby was born with a rare condition called EB ~ Epidermolysis Bullosa . Until now I never knew it existed.

I'm pretty sure baby Easton has touched everyone who has come across his story. He has brought together a family, a community and is touching hearts in parts of the world most of us will never see. In the few days he has been on this earth this little boy has done more for humanity than most people will accomplish in a lifetime. I was honored when I was asked to make the cake for his fundraiser.
Honored and determined to make this the best cake ever, pouring my heart into it as we have all poured our hearts into Easton. It feels so great to be able to do something that will help this family and this strong, sweet baby that I wanted to share it with all of you.
I lost sleep trying to come up with the perfect design.
Children with EB are called' Butterfly Children' because their skin is so fragile so I knew I had to have butterflies on this cake. I wanted to capture his parents love, and offer words of encouragement, and sentiment.  It had to be cheerful, colorful, and fun. It had to be perfect!

As I explained in an earlier post I no longer use boxed cake mixes even as a base for my cakes. In choosing to do so I have to say finding the perfect Vanilla Cake turned into real project. I always took vanilla cake for granted, what could be easier?! Plain old Vanilla.
HA!
I tried at least a dozen recipes, most were dry, some were too dense and almost like a pound cake, some too crusty, some not stable enough. I was about to give up and only offer chocolate cakes and then I thought to go through my Great Grandmother's recipe box. There is was, Vanilla Butter Cake, I had to at least try it. I was not optimistic, I was beginning to think Vanilla cake required a special je ne sais quoi that I just don't  have.
It made it through my in house taste testers with flying colors, so I took a bite. THIS was the one.
Here it is for anyone who is on a quest for a no fail vanilla cake recipe, if it worked for me it can work for anyone. Note : this cake is a yellow cake.

Vanilla Cake


1 cup softened butter
3 cups sugar
6 eggs
4 1/2 cups flour
2 tsp salt
7 tsp. baking powder
2 1/2 cups milk
2 tsp vanilla

Prep pans by lining with parchment and greasing the sides.  Preheat oven to 350 degree.
In a mixer beat butter until smooth, add the sugar and beat again until smooth. Then add the eggs and whip until fluffy. I let the Kitchen Aid go for at least 5 minutes.
While that is mixing, sift together the flour, baking powder, and salt.
Add the flour mixture to the egg mixture alternating with the milk, and vanilla. I start with dry and end with dry. Do not over mix. When you add the dry only mix until it is just incorporated, then add more milk.

Pour into the prepared pans and bake 30 minutes, test, if not done continue baking but check cakes often.


  For the butterflies I used the same design that was used on Easton's EB awareness pins that were designed special for him.
I used the bright color in the butterfly wings as the color scheme for the cake.

The top tier I used my tappits to cut out the words love, strength, hope, and courage and attached them to some gumpaste rectangles.
The middle tier I made a medallion of a mother and father holding a baby. I used a blue butterfly to represent Easton. The awareness ribbon for EB is red so I chose to use a red band around this layer.

The bottom I wanted bright and cheery. I cut strips of the fondant and wrapped them around the cake. I cut each strip , placed them all on a piece of lightly greased wax paper and lifted it all up and pressed onto the cake, starting in the middle and working may way around the sides. I ran my fondant smoother over the stripes with the wax paper still attached and once I had them pressed onto the cake firmly, I sloooowly peeled off the wax paper.
Next I added a few more of the stained glass butterflies and and decorated the board with an awareness ribbon  and my message.

I want to thank all of my followers who subscribe right here on Blogger and those who subscribe through email for taking the time to read this post. I am hopeful that many of you clicked on the link and let baby Easton touch your heart too. Please spread the word about this horrible disease and keep him in your thoughts. I am hoping for an opportunity to make this little fighters 1st birthday cake too!


Friday, September 7, 2012

A Dino- Mite Birthday Party

As my son turns 3 we are fully immersed in the 'dinosaur phase'.
I think it's a pretty common phase among 3 year old little boys as I was able to find a lot of ideas and information when I was planning his Extreme Dino Party.
I am no Martha Stewart and some of the ideas I found were over the top, but many I found I tweaked to my ability and had a great time start to finish with this party.

It all started with the invitations, I was going to buy some, but then I decided to dig through the bag of stamping goodies my Grandmother had given me and make my own.
I purchased a dinosaur stencil book , which I used A LOT!
With construction  paper and my stamps I cut out and printed my invitations.  They were just a cut out dinosaur on the front, stamped with a "Lets Party" stamp I found at Michaels, and one of the Time, date, RSVP stamps given to me by my Grandmother stamped on the inside.
I'm hoping to locate one so I can post a photo, but of course I was in such  hurry to get them in the mail I forgot to take one.

Next on the project list was the goody bags. Again I used my dinosaur stencil book with some fabric paints I purchased at Michaels and I stenciled dinosaurs onto small canvas bags I found on Etsy.


To fill them I found some:
Foam Dinosaur Masks
Glow sticks
Dinosaur tattoos
Dino paddle balls
Dinosaur stickers
Dinosaur blowers


The goody bags were the most fun to make!

For decorations I purchased inflatable dinosaurs, and some dinosaur footprint clings. It was going to be an outdoor party so there wasn't too much decorating required.


The menu was also fun to come up with.
I printed out place cards for each item and pasted them to some construction paper tents.
I used the Stratum and Lost World fonts for the lettering.

I also divided the table by Herbivore and Carnivore fare with some signs I made and framed.


On the menu:
Dinosaur Bones ~ Breadsticks with marinara dipping sauce
Dino Dogs ~ Vegan Veggie Dogs
Brontosaurus Burgers ~ Hillary's Black Bean Burgers
Pentaceratops Pizza ~ Cheese Pizza
Pastaraptor Salad ~ Pasta Salad
Jurassic Garden ~ Celery and carrot sticks in a clear cup with ranch dip in the bottom.
Microraptor Mac & Cheese ~ Mac n Cheese
Paleontologist Popcorn ~ Kettle Corn
Hot Lava Rocks ~ Snyders Buffalo Pretzel Bites
Carnotaurus Cake Pops ~ Cake Pops ..Ugggghhh


Next , what should have been the easiest part became the most difficult. The cake!
I designed the cake 6 months ago, I was ready!
A few months ago I posted that I would no longer book any additional cakes during the week of his birthday so that he could finally have a wonderful cake and not one that I threw together at the last minute during the wedding season madness.
Well, I was doing good... until the week before his party.
First came a request for an Xbox 360 cake for my neighbor, (who was also a neighbor growing up 30 miles from here, small world ).
Xbox 360, it's square, simple, sure. He needed the cake for the 25th, the day before my son's birthday and party. I figured it would be simple and I could squeeze it in so I said "Yes".
  {On a side note the Xbox 360 cake is carved, contoured and detailed WAY more than I imagined. By far the most difficult cake I have ever made, if you are ever asked to make one don't underestimate it.}
An hour later, I get a request for the ever popular belly cake. Another easy one, the request came from a cousin so of course I said I could squeeze that in too .
Now I have gone from just my son's cake, to 2 more, one for the day before his birthday, one for the day of. That should be enough right?
No, I soon learn that Brandon Sr.'s Grandmother will be turning 75 and would love a cake... 2 days after the party. Done..right??
Nope, my son's friend was celebrating his birthday 5 days after the party.  5 cakes , 6 days, a birthday party and a family vacation to Toronto in the middle.

       STRESS! ~STRESS!  ~STRESS!  ~STRESS! 

But I did it to myself, I swear, next year, I will only be doing his cake. 

Enough cake drama, back to the party....

Activities, how to keep 7 kids interested and involved. 
  • In this day and age a bounce house is almost mandatory for birthday parties, so Grandma ordered one.
  • Pinata's are quite popular, I was fortunate to find a great T-Rex  at Target


  • Our Easter egg hunt was such a hit we decided to do a Dinosaur egg hunt. I found Egg Gourds on Etsy and they worked GREAT as dinosaur eggs!

  • The forecast predicted 90 degrees for that day so we decided to finish off the party with a water balloon fight.

With all that done planned and pieced together it was time to cake.
I spent once entire evening making a Rice Krispy Treat T-Rex , carved and covered in fondant. Brandon took one look at it the next day and said" Cool T-rex but I want a Spinosaurus on my cake".  Seriously?!?
With 4 other cakes to get working on there was no way I could devote another evening to making a Spinosaurus...so I bought one !


The morning of the party I dipped the cake pops , which only came out slightly better than my first attempt. I did purchase a cake pop former that worked great and helped with the shaping, but my dipping needs a lot of work. 

This was the finished product


Everything was a hit... a Dino-mite party for the books.

I hope if you ever find yourself planning a dinosaur party feel free to use some of these ideas and have as much fun as I did designing and crafting.


Tuesday, August 14, 2012

Cake Pops

Ahhhhh, the cake pop. I have to admit I was never crazy about them and couldn't understand how mashed up cake and buttercream rolled together in a gooey ball could become so popular ,but it has, and I knew there would come a day when I would be asked to make them.
Well, that day has come , I have been not only asked, but begged to make cake pops. The culprit, my almost 3 year old son. Apparently he had one at Starbucks a few months ago and it really left an impression.
So for all of you who have avoided the cake pop trend, I'll take you though the steps so you can be prepared when you are begged to make them by someone too cute to resist.

As much as I dislike the cake pop, I have found some good qualities in them. Not only do they make my son quite happy, they use up my shaved off cake tops and left over buttercream so that I won't make them my 4th meal of the day.

I started by crushing up my left over cake top into a bowl and adding about 1/3 of a cup of buttercream.

I mixed it well and rolled it into balls.Then I placed the balls in the refrigerator for a few hours. You can speed this process up by placing them in the freezer for 15 minutes.

Next I melted some Wilton Candy Melts according to the microwave method on the package and dipped my cake pop stick in to coat the tip.


Insert the coated tip into the cake ball and return to the refrigerator or freezer for about 5 minutes.

Now your cake pop should look like this  ( or much better ) .


Dip the cake pop in the melted chocolate straight in.


The next step is very important ! Do not drag or swirl your cake pop, it can crumble and break away from the stick. 
Gently roll the cake pop in a clockwise or counter clockwise motion to coat.


Remove and you can roll them in sprinkles or decorate as you choose.
Seeing as this was my first cake pop experience I did none of that. You can also see in my finished product swirls of chocolate...those shouldn't be there. I didn't have my chocolate melted thin enough, next time I will melt better and work faster to avoid this. Just a tip to learn from my mistake.

I used a Styrofoam block as a drying station/ stand, this worked well.


I have to admit, being the cake pop hater that I am, cake pops truly are an art. They take a little practice but due to their overwhelming popularity it's worth it.
These lasted 1 day in our house so I'd say they were a hit. Looks like I'll be forced to enter the cake pop craze and make them again, and again, and again.

Enjoy!

... and please feel free to share any helpful hints you many have on cake~pops with me. I need all the help I can get .
After watching some Youtube tutorials I have decided to purchase " Cake Pops by Bakerella"

...she makes it look so easy! Stay tuned for new cake pop adventures .

Sunday, July 1, 2012

Ruffled Ombre Birthday Cake


I have been so busy with what I call " Wedding Season" that I almost forgot to schedule a cake for my wonderful Mother-in-Love ( surprisingly there is no sarcastic undertone when I say that, I really am very fond of her. )  With little time, and no ideas I decided on a ruffled 6 inch Dark Chocolate cake with a Chocolate Chambord Ganache.  She is a chocolate lover so there was no difficulty with that decision.

Lately I have scrapped my 'scratch/ box' recipes and have gone completely from scratch.  This was a result of baking 2 cakes, 1 was requested a box cake, the other 100% scratch. While taste testing the cake top shavings ( the best part of making cakes ) I realized I could taste a lot of chemicals in the box mix. Until side by side testing I never realized how strong the flavor of the chemicals were. So...those recipes are gone and so are all the boxes of cake mix from my pantry.

My NEW chocolate cake recipe is below~ full of wholesome goodness and no yucky chemical tasting stuff.( Now if I could just get rid of the calories too.)

New Dark Chocolate Cake


2 cups boiling water
1 cup unsweetened cocoa powder ( I use Hershey's)
2 3/4 cups all-purpose flour
2 tsp baking soda
1/2 tsp baking powder
1/2 tsp salt
1 cup unsalted butter ~ softened
2 1/4 cups granulated sugar
4 eggs
1 1/2 tsp vanilla extract

Preheat oven to 350 degrees F . Line 3 -8 inch round pans with parchment and grease the sides.
In a medium bowl pour the boiling water over the cocoa and whisk until smooth. Let this cool completely. ~ I make this hours ahead of the time I plan to bake my cake.
Sift together flour, baking soda,baking powder and salt. Set aside.
In a large bowl, cream butter and sugar together until light and fluffy. This take my mixer 2-3 minutes ( at least ) . Beat in eggs 1 at a time. Stir in vanilla. I let this whip another 3-4 minutes until very fluffy and light. 
Add the flour mixture alternating with the cocoa mixture. ~I make sure to start with the flour mixture and end with the flour mixture.
Pour batter evenly into pans.
Bake 25- 30 minutes. Check and add more time if necessary.
Let cool.

~ this recipe also makes 2- 6 inch cakes and 15 cupcakes.

Chocolate Ganache is one of my favorite icings and filling. Chocolate Ganache with a couple shots of Chambord is even better in my book!  I suppose you could use a teaspoon of Raspberry extract in place of the Chambord but that would take away all of the fun.

Chocolate Raspberry Ganache


18 oz. Semi sweet chocolate ( I use the Ghiradelli Bars ) 
1 1/2 cups heavy cream
3 TBSP  Chambord liquor

Break up chocolate into small chunks in a medium bowl.
In a medium saucepan heat cream until it just starts to boil.
Pour over chocolate and let sit a minute or 2.
Begin stirring chocolate and cream with a spoon, once smooth I switch to a whisk and whisk away for about 5 minutes until dark and very smooth.
Let cool for about 20 minutes , then stir in the Chambord.
Let the ganache sit on the counter for a few hours to set up. 

~I usually leave mine overnight or I will make up a batch I the morning to use later in the afternoon. Some people will put it in the refrigerator to speed up the process, I don't.
Ganache will keep for 2-3 days at room temp, and up to a week in the refrigerator.

One my cake was torted , filled with some whipped ganache, and iced I began making the fondant ruffles.
I start at the top of my cake with white, and make 2 strips of each color. I chose blue for this cake to fit beach setting where we planned to celebrate.

I roll my white fondant into 1/8 inch thick strips and use a scalloped cutter to make the waves.


Next I use my ball too to ruffle the edges of the scallops.


I rub each piece with a bit of water to glue it to the cake and work my way from top to bottom.


After 2 strips of white , I add in a small amount of blue fondant and mix well for the next 2. Once those are done I add in another small ball of blue to the remaining light blue fondant to make a little deeper blue. I repeat that after every 2 rows to darken the fondant gradually.

Repeat...repeat...repeat.


...and done!