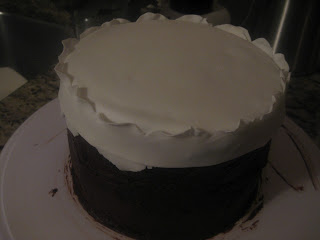
I have been so busy with what I call " Wedding Season" that I almost forgot to schedule a cake for my wonderful Mother-in-Love ( surprisingly there is no sarcastic undertone when I say that, I really am very fond of her. ) With little time, and no ideas I decided on a ruffled 6 inch Dark Chocolate cake with a Chocolate Chambord Ganache. She is a chocolate lover so there was no difficulty with that decision.
Lately I have scrapped my 'scratch/ box' recipes and have gone completely from scratch. This was a result of baking 2 cakes, 1 was requested a box cake, the other 100% scratch. While taste testing the cake top shavings ( the best part of making cakes ) I realized I could taste a lot of chemicals in the box mix. Until side by side testing I never realized how strong the flavor of the chemicals were. So...those recipes are gone and so are all the boxes of cake mix from my pantry.
My NEW chocolate cake recipe is below~ full of wholesome goodness and no yucky chemical tasting stuff.( Now if I could just get rid of the calories too.)
New Dark Chocolate Cake
2 cups boiling water
1 cup unsweetened cocoa powder ( I use Hershey's)
2 3/4 cups all-purpose flour
2 tsp baking soda
1/2 tsp baking powder
1/2 tsp salt
1 cup unsalted butter ~ softened
2 1/4 cups granulated sugar
4 eggs
1 1/2 tsp vanilla extract
Preheat oven to 350 degrees F . Line 3 -8 inch round pans with parchment and grease the sides.
In a medium bowl pour the boiling water over the cocoa and whisk until smooth. Let this cool completely. ~ I make this hours ahead of the time I plan to bake my cake.
Sift together flour, baking soda,baking powder and salt. Set aside.
In a large bowl, cream butter and sugar together until light and fluffy. This take my mixer 2-3 minutes ( at least ) . Beat in eggs 1 at a time. Stir in vanilla. I let this whip another 3-4 minutes until very fluffy and light.
Add the flour mixture alternating with the cocoa mixture. ~I make sure to start with the flour mixture and end with the flour mixture.
Pour batter evenly into pans.
Bake 25- 30 minutes. Check and add more time if necessary.
Let cool.
~ this recipe also makes 2- 6 inch cakes and 15 cupcakes.
Chocolate Ganache is one of my favorite icings and filling. Chocolate Ganache with a couple shots of Chambord is even better in my book! I suppose you could use a teaspoon of Raspberry extract in place of the Chambord but that would take away all of the fun.
Chocolate Raspberry Ganache
18 oz. Semi sweet chocolate ( I use the Ghiradelli Bars )
1 1/2 cups heavy cream
3 TBSP Chambord liquor
Break up chocolate into small chunks in a medium bowl.
In a medium saucepan heat cream until it just starts to boil.
Pour over chocolate and let sit a minute or 2.
Begin stirring chocolate and cream with a spoon, once smooth I switch to a whisk and whisk away for about 5 minutes until dark and very smooth.
Let cool for about 20 minutes , then stir in the Chambord.
Let the ganache sit on the counter for a few hours to set up.
~I usually leave mine overnight or I will make up a batch I the morning to use later in the afternoon. Some people will put it in the refrigerator to speed up the process, I don't.
Ganache will keep for 2-3 days at room temp, and up to a week in the refrigerator.
One my cake was torted , filled with some whipped ganache, and iced I began making the fondant ruffles.
I start at the top of my cake with white, and make 2 strips of each color. I chose blue for this cake to fit beach setting where we planned to celebrate.
I roll my white fondant into 1/8 inch thick strips and use a scalloped cutter to make the waves.
Next I use my ball too to ruffle the edges of the scallops.
I rub each piece with a bit of water to glue it to the cake and work my way from top to bottom.
After 2 strips of white , I add in a small amount of blue fondant and mix well for the next 2. Once those are done I add in another small ball of blue to the remaining light blue fondant to make a little deeper blue. I repeat that after every 2 rows to darken the fondant gradually.
Repeat...repeat...repeat.
...and done!


No comments:
Post a Comment
Note: Only a member of this blog may post a comment.