I had a friend e-mail me a photo of a cake she wanted for her fiance's birthday. A medieval looking book with snakes coming out of and wrapping around it. It will be presented at a Halloween party and I have to say it goes very well with the holiday theme. So, I'll take you through the steps beginning to end , recipes included.
It all started Wednesday night, I whipped up my favorite 'go-to' cake with the intent of making 2 half- sheet cakes. People RAVE about this cake...I have been asked for my recipe too many times to count. Is it homemade? Umm ..Kinda...but I have a secret ingredient...


This cake is going to be filled with strawberries. I just cannot bear to use store bought preserves, so I make my own strawberry filling. If it's strawberry season I use fresh, if not I use frozen ( thawed of course ).

I lift the top off and set aside and start to fill my cake. Also when using real fruit I put a thin layer of buttercream on the inside layer to act as a barrier so the juices won't saturate my cake if my filling ends to being too moist. Then I pipe a nice dam of buttercream around the edges so it doesn't leak out the sides and it also give the cake a little more height.


Fill and replace the top on the cake.

I'd love to say that I just put a thin coat of vegetable shortening on the mat and roll it out and transfer it onto the cake board ,just that easy, but sometimes it's not. I tried, but ended up putting the fondant ball right on the cakeboard and rolling it out on the board. Is it the" proper" way ? No, but sometimes ya do what ya gotta do to get the job done.


Next I cut some strips on black fondant to place around the cake to look like the back cover. Yes, I could have rolled to a GIANT piece of fondant and folded it over but this is easier and more cost effective.


As you can see in the picture above I already have my supports in place. I use food safe wooden dowels cut to the height of the bottom tier to support the top cake. These are VERY important!! Do not skip this step or your cake can self destruct from the weight.
Now it's time for the top of the book, I set that carefully on top of the bottom tier. Now what you have should look like this
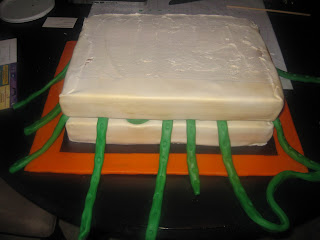
I know, you are thinking "What the heck?!" It gets better , trust me. I was thinking the same thing at this stage.
So now I roll out a large enough piece of black fondant to cover the back and the top of the book with a little over hang. Here is where no matter how much you know about fondant, you have to forget it. Without greasing or sugaring your mat roll the fondant out. You actually want it to stick to the mat a bit.
I then pull the mat , covered with the black fondant, off the table and place it on top of the book, fondant side down. Slowly and evenly I start to peel back the mat, you will have to use your other hand to swipe the fondant from the mat, it will stick in spots. This crazy technique is how I get a worn leather effect for the book.
Then roll the uneven edges ( if you have them, and I do) under , evenly, to create the edges of the top cover.

Things were going great, I was actually ahead of schedule.
All week I had planned on using the gold cake spray to spray on the lettering and designs on the cover. It was to say "Happy Birthday" and have some images from a book that her fiance reads.
Last weekend I cut out the stencil , and was ready for the easiest part of this whole project. Just a few sprays and done. Well, I don't recommend cake spray for stencils as the overspray is unbelievable!
So plan B , mix some gold petal dust with vodka and paint them on! Yeah right! Epic FAIL! The vodka bleeds right through the paper.
So , plan C, reprint and hand cut from gumpaste/ fondant mix.


It all started Wednesday night, I whipped up my favorite 'go-to' cake with the intent of making 2 half- sheet cakes. People RAVE about this cake...I have been asked for my recipe too many times to count. Is it homemade? Umm ..Kinda...but I have a secret ingredient...

There it is..I have officailly "outed' myself.
White Almond Sour Cream Cake ( aka Wedding Cake )
~this is a tweeked Cake Doctor recipe.
1 (18.5 oz) box white cake mix
1 cup all-purpose flour
1 cup granulated white sugar
3/4 teaspoon salt
1 1/3 cups water
2 tablespoons vegetable oil
1/2 cup sour cream
4 large egg whites
1 teaspoon almond extract
1 teaspoon vanilla extract
Directions:
1. Preheat oven to 325° F.
2. Line bottom of pan with parchment and grease the sides.
3. In a large bowl, whisk together cake mix, flour, sugar and salt. Add remaining ingredients and beat with hand mixer for 3 minutes, or until blended.
4. Pour into prepared pan and bake according to size of pan. I bake all sizes for 30 minutes, check and then continue baking 10 minutes at a time until it is done.
** This recipe doesn't rise like other cakes, it has more of a pound cake texture so I fill my pans within about 3/4 of an inch of the height I need the cake to be.
Everything was going great, poured my batter in the pan, tapped it on the counter until all the little bubbles rose to the surface and popped.
Wrapped my bake even strip around the pan so it would bake nice and level. <- These things are great! I have very little leveling to do when I use them. Just make sure they are good and soaked with water before you put them on the pan.
Wrapped my bake even strip around the pan so it would bake nice and level. <- These things are great! I have very little leveling to do when I use them. Just make sure they are good and soaked with water before you put them on the pan.

Here she is...a golden beauty!
I let this one cool , while I baked the other. Something wasn't quite right though, what did I forget? Oh yeah, the parchment paper and I use the flower nail trick to make sure the center of my larger cakes bake as quick as the sides. I'm sure it will be fine though....

Oh $#%^*, proof that the little things can make all the difference ( and that I am not a world class baker ) .
**Just make sure you start your baking in time to re-bake if necessary.
On to the icing. This cake is going to be covered in fondant.
Truth be told ~ I dont' care for fondant. Working with it is fine, and it makes a beautiful clean finish on a cake, but eating it?! Some folks do...I do not. So, for all the anti-fondant people like myself, I first put a nice coat of buttercream icing on my cakes. Then when I eat a piece, I just peel the fondant off and still have cake and icing.
Truth be told ~ I dont' care for fondant. Working with it is fine, and it makes a beautiful clean finish on a cake, but eating it?! Some folks do...I do not. So, for all the anti-fondant people like myself, I first put a nice coat of buttercream icing on my cakes. Then when I eat a piece, I just peel the fondant off and still have cake and icing.
My buttercream is also one of my most requested recipes.
It's sweet, but it's not too greasy. It's more fluffy and less like spackle. So, again, here's my recipe.
It's sweet, but it's not too greasy. It's more fluffy and less like spackle. So, again, here's my recipe.

 |
| save and print jpeg |
I took my cooled cakes ( once I re-baked my 1st ) and torted it. When I use fruit fillings I only torte once in case they start to bleed into the cake.

I lift the top off and set aside and start to fill my cake. Also when using real fruit I put a thin layer of buttercream on the inside layer to act as a barrier so the juices won't saturate my cake if my filling ends to being too moist. Then I pipe a nice dam of buttercream around the edges so it doesn't leak out the sides and it also give the cake a little more height.


Fill and replace the top on the cake.
Next I put my layer of buttercream all over and pop it in the refrigerator until I'm ready for the fondant.
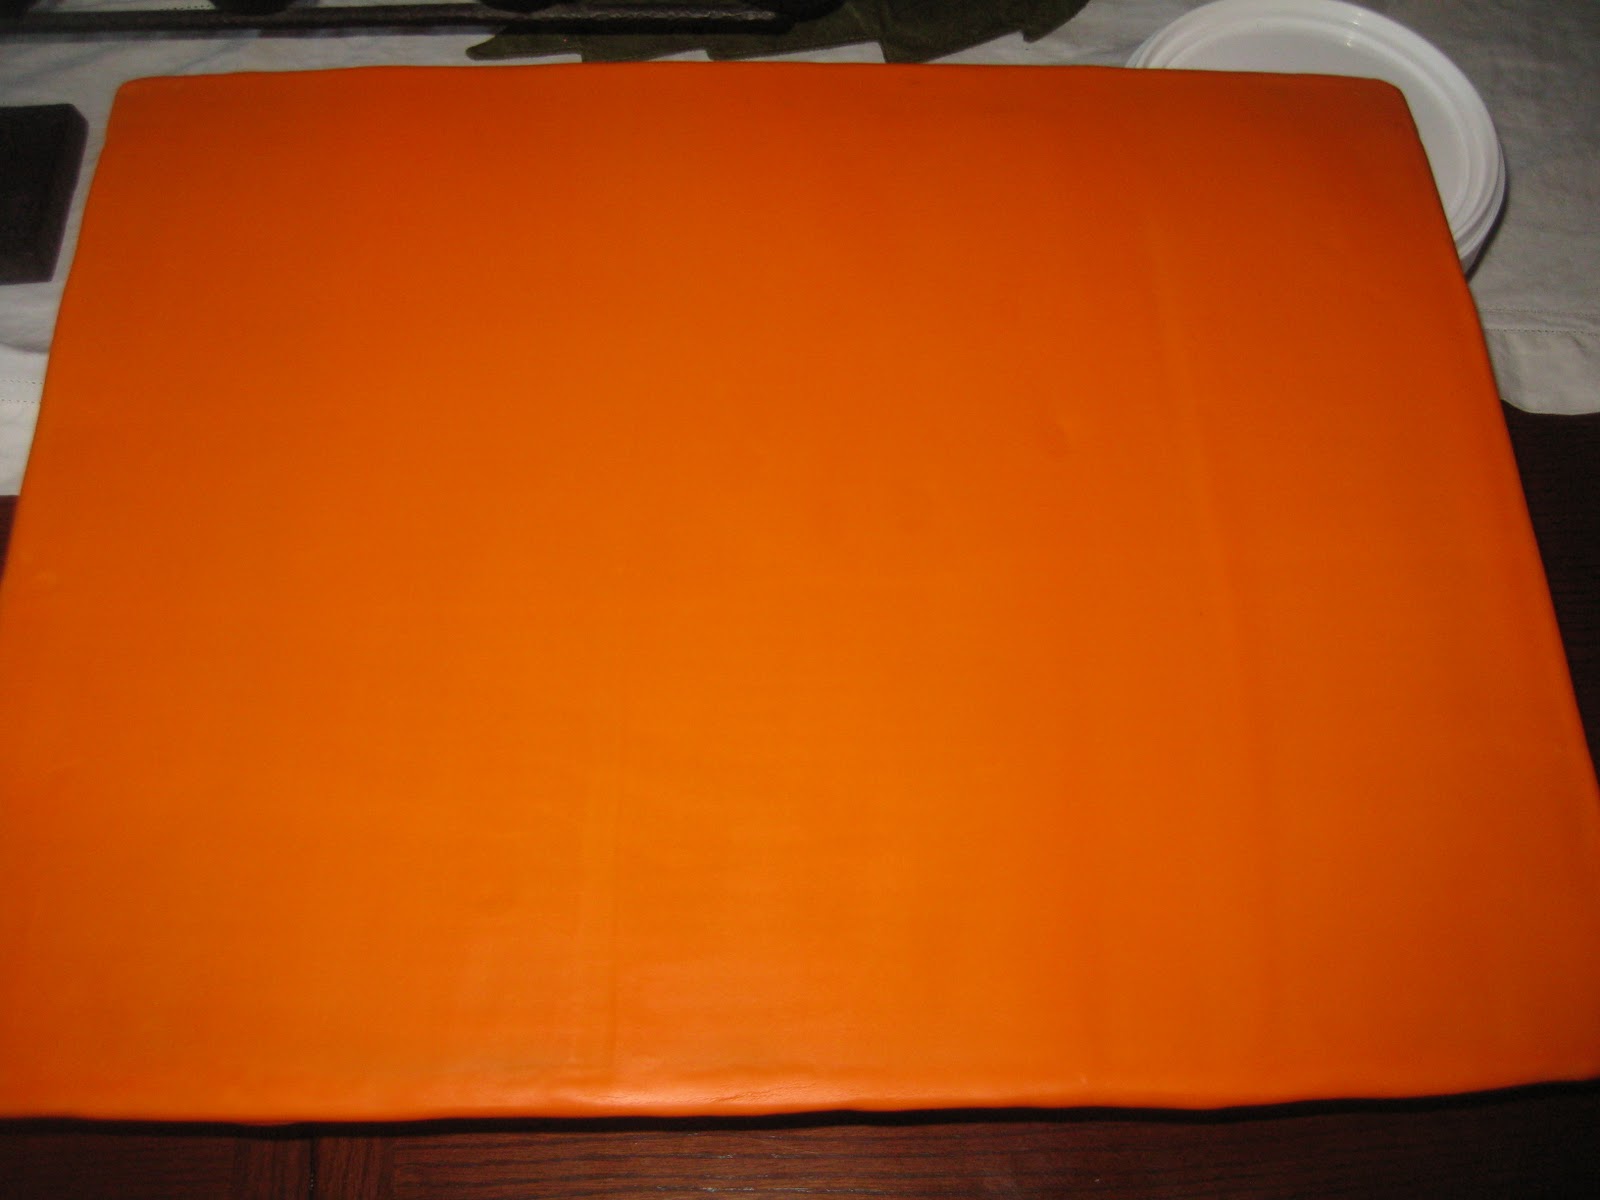
So keeping with my Halloween theme I pull out a ball of orange fondant. I bought some Duff's at the store because I had coupon. I have to admit the flavor of Duff's makes it pretty edible , but it's very soft and doesn't dry very quick or very hard. If you plan on using it for any accents you MUST use gumpaste.

I'd love to say that I just put a thin coat of vegetable shortening on the mat and roll it out and transfer it onto the cake board ,just that easy, but sometimes it's not. I tried, but ended up putting the fondant ball right on the cakeboard and rolling it out on the board. Is it the" proper" way ? No, but sometimes ya do what ya gotta do to get the job done.
With the cakes in the fridge chilling, and the fondant on the board drying, I get a break.
Ok, I'm back and ready to roll...fondant =) First I cover 3 sides of the book with a long strip of white fondant and smooth it. Some people go out and buy plastic fondant smoothers I haven't yet, I take a ball of fondant, press it on the table to give it a flat side and the I use that to smooth and contour my cakes. Works great ! Once that's done I run one of my pointy flower tools repeatedly across to make pages. If you have a new, unused fine tooth comb, they are perfect for the job. Once that is done I give it a quick spray with some gold cake paint.
The bottom half of the book is now ready to go on the cake board. I put a few swipes of buttercream on it to " glue" it in place and then I do my best to center it on the cake board and now the fun begins!


Once all 3 sides are done I start to make the snakes, or vines, or abstract snakes and vines. Not really sure what they are but they are green fondant. I roll out a few of these ropes of different lengths and lay them on the cake.


Now it's time for the top of the book, I set that carefully on top of the bottom tier. Now what you have should look like this

I know, you are thinking "What the heck?!" It gets better , trust me. I was thinking the same thing at this stage.
So now I roll out a large enough piece of black fondant to cover the back and the top of the book with a little over hang. Here is where no matter how much you know about fondant, you have to forget it. Without greasing or sugaring your mat roll the fondant out. You actually want it to stick to the mat a bit.
I then pull the mat , covered with the black fondant, off the table and place it on top of the book, fondant side down. Slowly and evenly I start to peel back the mat, you will have to use your other hand to swipe the fondant from the mat, it will stick in spots. This crazy technique is how I get a worn leather effect for the book.
Then roll the uneven edges ( if you have them, and I do) under , evenly, to create the edges of the top cover.

All week I had planned on using the gold cake spray to spray on the lettering and designs on the cover. It was to say "Happy Birthday" and have some images from a book that her fiance reads.
Last weekend I cut out the stencil , and was ready for the easiest part of this whole project. Just a few sprays and done. Well, I don't recommend cake spray for stencils as the overspray is unbelievable!
So plan B , mix some gold petal dust with vodka and paint them on! Yeah right! Epic FAIL! The vodka bleeds right through the paper.
So , plan C, reprint and hand cut from gumpaste/ fondant mix.

4 hours later....the book is done. ( And so was I )


I think it will look great at their Halloween Bash!
Any questions on how to make this please feel free to contact me.
Does your butter cream have to be refrigerated due yo the heavy cream?
ReplyDeleteIt does need to be refrigerated due to the heavy cream and once delivered, it needs to stay in a cool spot. I have had very good luck turning the humidity level all the way down in my refrigerator when making a fondant covered cake and storing it in there overnight.
ReplyDeleteCan you use all butter for this buttercream recipe instead of using any shortening? Would I just substitute the 1 1/2 cups of shortening for butter or would I have to change the amount?
ReplyDeleteI now use a new buttercream recipe that uses all butter and is WONDERFUL!
ReplyDelete2 cups unsalted butter
6- 8 cups confectioners sugar
1 TBSP vanilla extract ( or whatever flavor you would like to add)
8 TBSP of prepared powdered coffee creamer
then I mix it up the same way as my old recipe.
Hope this helps!
Coffee creamer?! Interesting! I will definitely give it a try. Thanks!
DeleteYes, powdered coffee creamer, prepared with water. You can use flavored ones also. This is a little trick I learned to take the dairy cream out and make the icing safe to sit out at room temperature for long periods of time safely.
ReplyDelete